Mastering Dryer Vent Hose Installation: A Complete Guide
Many homeowners overlook the importance of this task, assuming it’s a simple DIY project. However, improper installation can lead to lint buildup, moisture issues, and even carbon monoxide leaks in gas-powered dryers. Understanding the nuances of dryer vent hose installation can save you time, money, and stress in the long run. This guide will walk you through everything you need to know, from choosing the right materials to executing the installation with precision. Dryer vent hose installation is more than just connecting a tube from your dryer to the wall. It involves selecting the correct hose type, ensuring proper ventilation, and adhering to safety standards. A well-installed vent hose improves energy efficiency, reduces drying time, and extends the lifespan of your appliance. Unfortunately, many people make common mistakes, such as using plastic or foil hoses, which are prone to kinking and trapping lint. These errors can compromise airflow and create dangerous conditions. With the right knowledge and tools, you can avoid these pitfalls and ensure your dryer operates at peak performance. In this article, we’ll explore the step-by-step process of dryer vent hose installation, discuss common mistakes to avoid, and answer frequently asked questions to help you feel confident in your project. Whether you’re a seasoned DIY enthusiast or a first-time homeowner, this guide will equip you with the expertise needed to tackle this essential task. Let’s dive in and uncover the secrets to a safe and efficient dryer vent hose installation.
Table of Contents
- Why Is Dryer Vent Hose Installation Important?
- Choosing the Right Materials for Your Dryer Vent
- Step-by-Step Guide to Dryer Vent Hose Installation
- Common Mistakes to Avoid When Installing a Dryer Vent Hose
- How Can You Maintain Your Dryer Vent System?
- What Are the Signs of a Poorly Installed Dryer Vent Hose?
- Tools and Equipment Needed for Dryer Vent Hose Installation
- FAQs About Dryer Vent Hose Installation
Why Is Dryer Vent Hose Installation Important?
Proper dryer vent hose installation is a critical aspect of home maintenance that directly impacts safety and efficiency. Without a well-installed vent hose, your dryer can become a potential fire hazard. According to the U.S. Fire Administration, dryers are responsible for nearly 2,900 residential fires annually, many of which are caused by lint buildup in improperly vented systems. Lint is highly flammable, and when trapped in a poorly installed hose, it can ignite under the heat generated by the dryer. This underscores the importance of ensuring your dryer vent hose installation adheres to safety standards. Beyond fire prevention, a properly installed vent hose enhances the performance of your dryer. When air flows freely through the vent, it expels moisture and heat efficiently, reducing drying time and energy consumption. On the other hand, a clogged or kinked hose forces the dryer to work harder, leading to increased wear and tear on its components. This not only shortens the appliance’s lifespan but also results in higher utility bills. By investing time in proper dryer vent hose installation, you can save money and reduce your carbon footprint. Another reason dryer vent hose installation is essential is its role in maintaining indoor air quality. A poorly vented dryer can release moisture and lint into your home, leading to mold growth and respiratory issues. Additionally, gas-powered dryers produce carbon monoxide, a colorless and odorless gas that can be deadly if not properly vented. Ensuring your vent hose is installed correctly prevents these risks, creating a safer and healthier living environment for you and your family.
Choosing the Right Materials for Your Dryer Vent
The success of your dryer vent hose installation largely depends on selecting the right materials. Not all hoses are created equal, and using the wrong type can compromise the safety and efficiency of your dryer. The most common materials for dryer vent hoses include aluminum, semi-rigid metal, and plastic or foil. However, not all of these options are suitable for every installation. Let’s explore the pros and cons of each material to help you make an informed decision.
Read also:Discover The Largest Domestic Cat Breeds A Comprehensive Guide
Aluminum Hoses: The Gold Standard
Aluminum hoses are widely regarded as the best choice for dryer vent hose installation. These hoses are flexible, durable, and resistant to kinks, making them ideal for most setups. Unlike plastic or foil alternatives, aluminum hoses do not trap lint, ensuring optimal airflow and reducing the risk of fire. Additionally, aluminum is heat-resistant, which enhances safety during operation. While aluminum hoses may be slightly more expensive than other options, their longevity and reliability make them a worthwhile investment.
Why Avoid Plastic or Foil Hoses?
Plastic or foil hoses are often marketed as budget-friendly options for dryer vent hose installation, but they come with significant drawbacks. These materials are prone to kinking, which restricts airflow and traps lint. Over time, this can lead to overheating and increase the likelihood of a fire. Moreover, plastic hoses are not heat-resistant, making them unsuitable for high-temperature environments. If you currently use a plastic or foil hose, consider upgrading to a metal alternative to ensure safety and efficiency.
Semi-Rigid Metal Hoses: A Middle Ground
Semi-rigid metal hoses strike a balance between flexibility and durability. Made from lightweight metal, these hoses are easier to install than rigid ducts but offer better performance than plastic or foil options. They are less likely to kink and provide a smooth interior surface that minimizes lint accumulation. However, semi-rigid hoses may not be suitable for installations that require sharp bends or long runs. For most homeowners, aluminum remains the top choice, but semi-rigid metal hoses can be a viable alternative in specific scenarios.
Step-by-Step Guide to Dryer Vent Hose Installation
Installing a dryer vent hose may seem daunting, but with the right tools and guidance, it’s a manageable DIY project. Follow these steps to ensure a safe and efficient installation.
Step 1: Gather Your Tools and Materials
Before you begin, make sure you have all the necessary tools and materials. You’ll need:
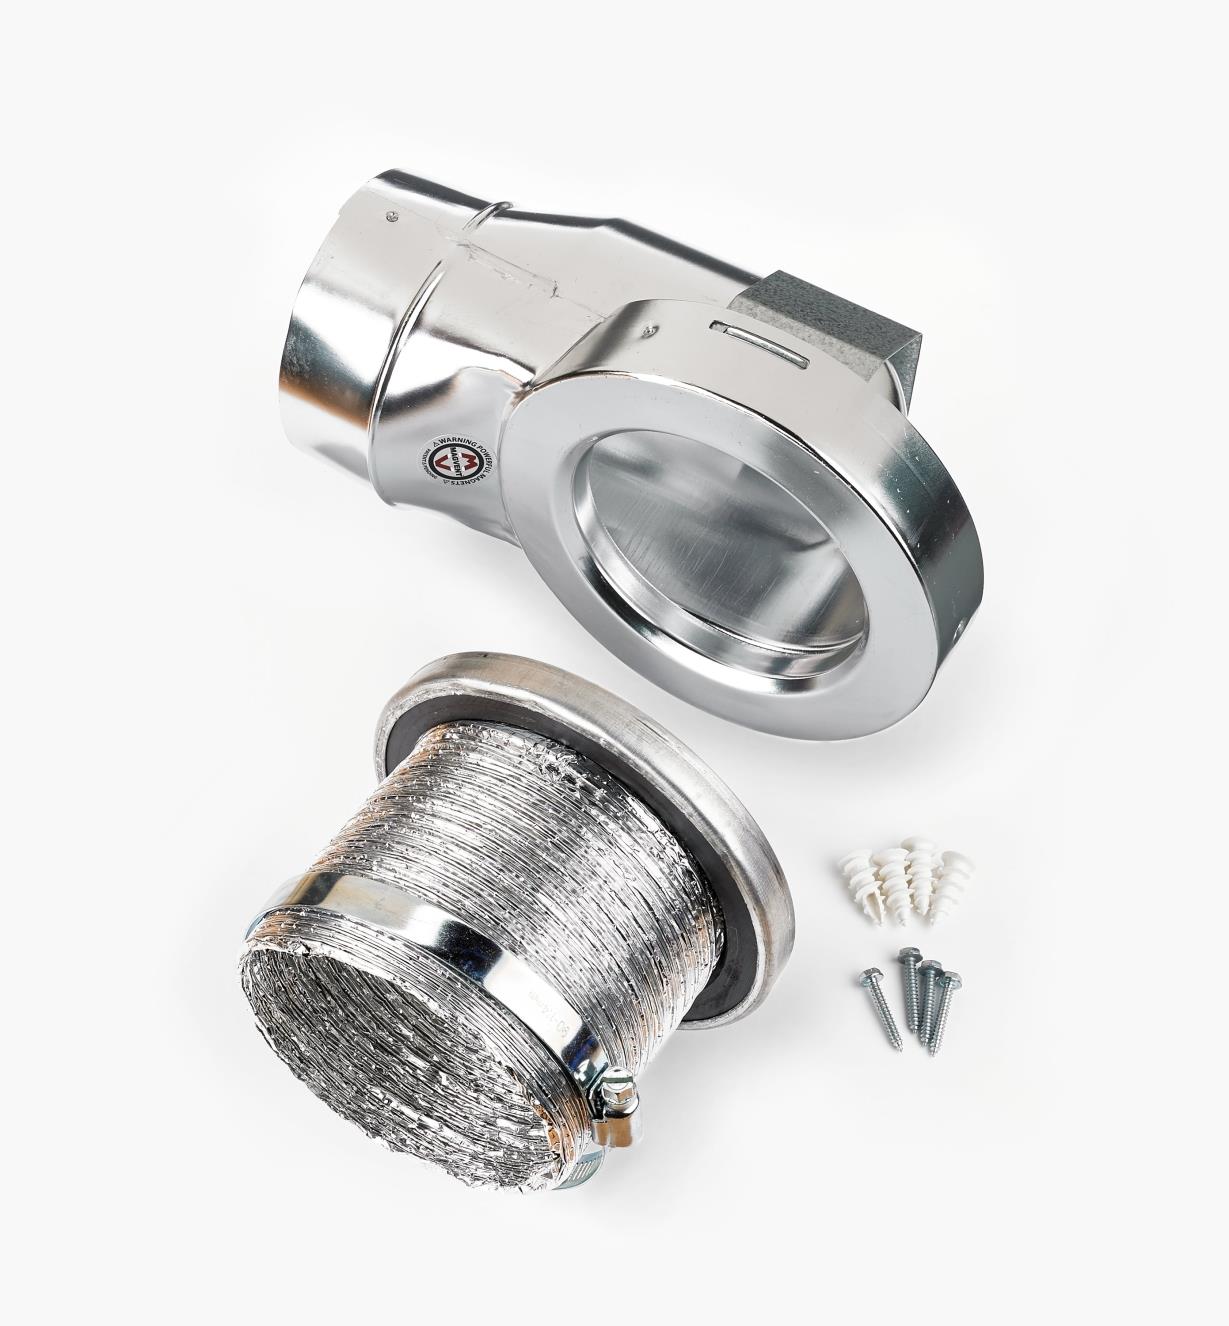
- An aluminum or semi-rigid metal hose
- Duct clamps or foil tape
- A drill and hole saw
- A vent hood or louvered vent cover
- A measuring tape and pencil
- Screwdriver and screws
Having everything on hand will streamline the process and prevent interruptions.
Read also:What Happened To Dannielle Merrifield A Comprehensive Look Into Her Journey
Step 2: Choose the Vent Location
Selecting the correct vent location is crucial for effective dryer vent hose installation. Ideally, the vent should exit the house as close to the dryer as possible to minimize the hose length. Avoid routing the hose through living spaces or attics, as this can lead to moisture buildup and mold growth. Mark the spot on the wall where the vent will exit and ensure it’s clear of obstructions.
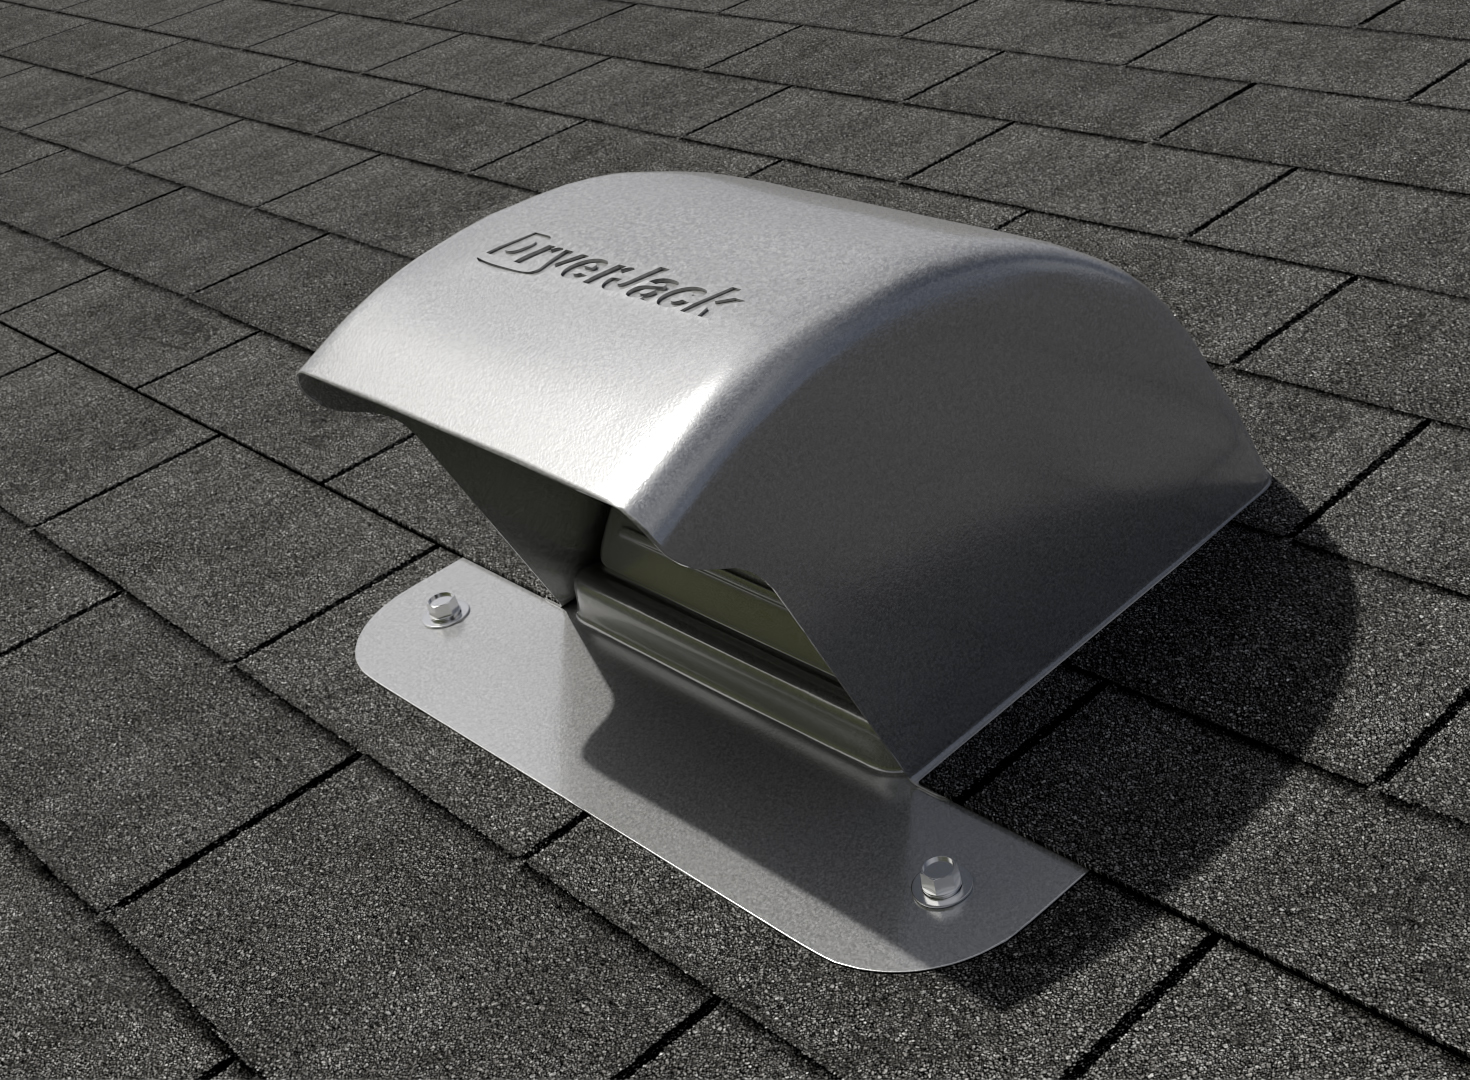
Step 3: Install the Vent Hood
Once the location is chosen, drill a hole through the wall using a hole saw. Attach the vent hood or louvered cover to the exterior of the house using screws. Ensure the hood is secure and properly aligned to prevent air leaks. This step is vital for directing airflow outside and preventing pests from entering the hose.
Step 4: Connect the Hose to the Dryer
Attach one end of the hose to the dryer’s exhaust port using a duct clamp or foil tape. Avoid using regular duct tape, as it can degrade over time and compromise the seal. Ensure the connection is tight to prevent air leaks. If the hose needs to bend, use gentle curves to avoid kinks that restrict airflow.
Step 5: Route and Secure the Hose
Run the hose through the wall and connect it to the vent hood. Use duct clamps or foil tape to secure both ends of the hose. Inspect the entire length to ensure there are no kinks or obstructions. Once everything is in place, test the dryer to confirm proper airflow and operation.
Common Mistakes to Avoid When Installing a Dryer Vent Hose
Even with the best intentions, many homeowners make mistakes during dryer vent hose installation that compromise safety and efficiency. Being aware of these pitfalls can help you avoid them and ensure a successful project.
Using the Wrong Hose Material
One of the most common mistakes is using plastic or foil hoses instead of metal ones. As discussed earlier, these materials are prone to kinking and lint buildup, which can lead to overheating and fire hazards. Always opt for aluminum or semi-rigid metal hoses to ensure optimal performance.
Overlooking Hose Length and Bends
Another frequent error is using a hose that’s too long or has too many bends. The International Residential Code (IRC) recommends a maximum vent length of 25 feet, with deductions for each 90-degree bend. Exceeding these guidelines can restrict airflow and reduce dryer efficiency. Plan your installation carefully to minimize hose length and avoid sharp turns.
Improper Sealing and Connections
Failing to seal connections properly is another common issue. Loose or poorly sealed joints can lead to air leaks, lint accumulation, and reduced performance. Use duct clamps or foil tape to secure all connections and inspect them regularly for signs of wear or damage.
How Can You Maintain Your Dryer Vent System?
Proper maintenance is essential to ensure the longevity and efficiency of your dryer vent system. Regular upkeep not only prevents costly repairs but also enhances safety and performance. Here’s how you can maintain your dryer vent system effectively.
Clean the Lint Trap After Every Use
The lint trap is the first line of defense against lint buildup in your dryer vent system. Always clean it after each load to prevent lint from entering the hose. This simple step can significantly reduce the risk of clogs and improve airflow.
Inspect the Hose and Vent Regularly
Periodically check the hose and vent for signs of lint accumulation, kinks, or damage. If you notice any issues, address them immediately to prevent further complications. Consider scheduling annual professional inspections to ensure your system is in top condition.
Use a Vent Cleaning Kit
For deeper cleaning, invest in a vent cleaning kit. These kits typically include brushes and rods that allow you to remove lint from the hose and vent without disassembling the system. Regular cleaning ensures optimal airflow and reduces the risk of fire.
What Are the Signs of a Poorly Installed Dryer Vent Hose?
Identifying the signs of a poorly installed dryer vent hose can help you address issues before they escalate. Here are some red flags to watch for.
Extended Drying Times
If your clothes take longer than usual to dry, it could indicate restricted airflow caused by a kinked or clogged hose. Check the hose for obstructions and ensure it’s properly installed.
Excessive Heat or Moisture in the Laundry Room
A poorly vented dryer can release heat and moisture into your home, leading to discomfort and potential mold growth. If you notice these issues, inspect your vent hose for leaks or improper connections.
Burning Smell or Lint Accumulation
A burning smell or visible lint around the dryer is a serious warning sign. It may indicate lint buildup in the hose or vent, which can pose a fire hazard. Address the issue immediately to ensure safety.
Tools and Equipment Needed for Dryer Vent Hose Installation
Having the right tools and equipment is essential for a successful dryer vent hose installation. Here’s a comprehensive list to help you prepare.
- Aluminum or semi-rigid metal hose
- Duct clamps or foil tape
- Drill and hole saw
- Vent hood or louvered vent cover
- Measuring tape and pencil
- Screwdriver and screws
Using high-quality tools ensures a secure and efficient installation.
FAQs About Dryer Vent Hose Installation
How Often